

 English
 日本語
日本語 Español
What a Foam Roller Actually Does to Muscle Tissue
Foam rolling works through a process called self myofascial release (SMR) — applying sustained mechanical pressure to soft tissue to reduce tension, improve tissue mobility, and decrease localised pain. Fascia is the connective tissue that surrounds and runs through muscles, and when it becomes restricted through inactivity, overuse, or dehydration, it limits the range of motion available to the muscle beneath it.
The pressure applied by a foam roller stimulates mechanoreceptors — sensory receptors embedded in the fascia and muscle — which trigger a neurological relaxation response. Research published in the Journal of Athletic Training found that 60–90 seconds of sustained pressure on a trigger point produced measurable reductions in tissue stiffness and increased range of motion without reducing muscle activation, which distinguishes foam rolling from static stretching in terms of pre-activity suitability.
A secondary mechanism is increased local blood flow. Rolling increases circulation to the treated area, which assists in the removal of metabolic waste products accumulated during exercise and accelerates the delivery of oxygen and nutrients during recovery. This is why foam rolling for stiff muscles tends to produce near-immediate relief — the response is partly neurological, partly circulatory, and does not require the gradual tissue remodelling that longer-term flexibility training depends on.
Foam Roller vs Stretching: Understanding the Difference
Foam rolling and stretching address tissue restriction through fundamentally different mechanisms, which is why the question of foam roller or stretching is not an either/or decision — they are complementary tools that work best in sequence.
Static stretching lengthens muscle fibres by applying sustained tension through a joint's range of motion. It is primarily effective at increasing the extensibility of the muscle belly itself. Foam rolling, by contrast, targets the fascial layer and the trigger points within it — areas of localised hypersensitivity and reduced tissue compliance that static stretching often cannot reach effectively, because the surrounding tissue compensates before the restricted area is fully addressed.
The practical implication: rolling first, then stretching, produces better outcomes than either technique alone. The foam roller releases the fascial restrictions that limit how deeply a subsequent stretch can penetrate, meaning the same stretch position achieved after rolling produces greater tissue lengthening than when performed on unprepared tissue.
A 2015 study in the International Journal of Sports Physical Therapy demonstrated that subjects who combined foam rolling with static stretching showed significantly greater hip flexor range of motion improvements than those who performed static stretching alone over a four-week period. The combination group also reported lower post-exercise muscle soreness scores.
Foam Roll Before or After Stretching: The Correct Sequence
The sequencing question resolves differently depending on whether the session is pre-workout or post-workout, and whether the goal is performance preparation or recovery.
Before a Workout
The recommended sequence is: light cardiovascular warm-up → foam rolling → dynamic stretching. Static stretching performed before exercise has been shown in multiple studies to temporarily reduce force production and muscle activation — an effect that is counterproductive before strength training or explosive activity. Foam rolling does not carry this risk. Rolling pre-workout addresses tissue restrictions and increases joint range of motion without the neuromuscular inhibition associated with prolonged static holds.
Keep pre-workout rolling sessions brief: 30–60 seconds per muscle group, focusing on areas relevant to the planned session. The goal is preparation, not deep tissue work.
After a Workout
Post-workout, both foam rolling and static stretching are appropriate and beneficial. The recommended sequence is: foam rolling → static stretching. Muscles are warm and more pliable after exercise, making this the optimal window for both techniques. Rolling first addresses acute tightness and trigger point activity generated during training; static stretching follows to capitalise on the tissue compliance the roller has created.
Post-workout sessions can be longer and more thorough — 60–120 seconds per area — particularly on muscle groups that were heavily loaded during the session.
How to Use a Foam Roller: Technique Fundamentals
Effective foam rolling technique follows a consistent set of principles regardless of which muscle group is being targeted.
- Position the roller perpendicular to the muscle fibres — for a quadriceps roll, the roller runs across the thigh, not along it. You then move your body along the roller, not the roller across your body.
- Apply controlled, moderate pressure. Use your arms or non-targeted leg to partially unload your body weight on the roller. Full body weight is appropriate for large, thick muscle groups (glutes, upper back); partial loading is better for smaller or more sensitive areas (calves, IT band).
- Move slowly — approximately one inch per second. Fast rolling reduces the mechanical stimulus to the fascial receptors and limits the neurological release response. Slow, deliberate movement allows the tissue time to respond.
- When you find a tender spot, pause. Hold sustained pressure on trigger points for 20–30 seconds or until you feel the tissue soften and the sensitivity reduce — typically described as a "melting" sensation. This is the neurological release occurring.
- Breathe steadily throughout. Holding the breath in response to discomfort increases muscular tension and works against the relaxation response you are trying to generate. Slow diaphragmatic breathing during rolling enhances the release effect.
- Avoid rolling directly over joints, bones, or the lower back. Foam rolling is a soft tissue technique. Rolling over bony prominences is uncomfortable and unproductive; rolling over the lumbar spine without core support can stress the vertebral structures.
How Long Should You Foam Roll Each Muscle Group
Duration recommendations vary in the research literature, but current evidence supports the following practical guidelines:
- Minimum effective dose: 30–60 seconds of continuous rolling per muscle group produces measurable increases in range of motion in most studies. Below 30 seconds, the neurological response is inconsistent.
- Optimal range: 60–120 seconds per area for general maintenance and recovery. This duration allows for full coverage of the muscle group and adequate time on any trigger points identified during the roll.
- Extended trigger point holds: When holding on a specific tender spot, 20–30 seconds is the standard recommendation. Holds beyond 90 seconds have not been shown to produce meaningfully greater release in most tissue types.
- Total session length: A comprehensive full-body rolling session addressing six to eight major muscle groups takes 10–20 minutes. A targeted pre- or post-workout session covering two to four relevant areas takes 5–10 minutes.
More time does not always mean more benefit. Rolling a single muscle group for five or more minutes produces diminishing returns after the initial release has occurred. If significant tightness remains after two minutes on one area, moving on and returning in a subsequent session is typically more productive than continuing to load already-stimulated tissue.
Self Myofascial Release Techniques for Key Problem Areas
The following techniques cover the areas most commonly addressed in self myofascial release at home, with specific positioning notes for each.
Thoracic Spine (Upper Back)
Place the roller horizontally across the mid-back at approximately shoulder blade level. Support your head with interlaced hands (do not pull the neck forward). Lift your hips and use your feet to slowly move your body so the roller travels from the base of the shoulder blades to the base of the neck. This is one of the most effective applications of foam rolling for desk workers: the thoracic spine is the region most affected by prolonged flexed posture, and rolling it directly addresses the postural compensation patterns that generate neck and upper trap tension.
Quadriceps and Hip Flexors
Lie face down with the roller under one thigh, just above the knee. Support your upper body on forearms. Roll from just above the knee to the hip crease, pausing on any tender areas. To increase specificity, rotate the leg slightly inward or outward to access different portions of the quad. For the hip flexors (rectus femoris specifically), position the roller at the very top of the thigh where it meets the hip — this is a sensitive area and partial unloading is recommended.
Foam Roller Psoas Muscle
The psoas is a deep hip flexor that connects the lumbar vertebrae to the femur. It is among the most chronically tight muscles in sedentary populations and is difficult to access with standard stretching. For foam roller psoas muscle release, lie face down and position the roller slightly lateral to the navel on the side being treated — not directly on the spine. The psoas runs diagonally, so the target zone is roughly between the bottom of the ribcage and the hip bone, about two to three inches from the midline. This is a sensitive area; use very light pressure and short holds of 15–20 seconds to start. Avoid this technique if you have inflammatory bowel conditions or abdominal tenderness.
IT Band and Lateral Thigh
Lie on your side with the roller under the outer thigh, just below the hip. Stack your feet or place the top foot on the floor in front for stability. Roll from below the hip to above the knee. The IT band itself is a dense fibrous band rather than a muscle and does not release in the same way muscle tissue does — the primary benefit here is addressing the vastus lateralis (outer quad) and gluteus minimus beneath the IT band, rather than the band itself. Use partial body weight; full loading on the lateral thigh is unnecessarily uncomfortable for most people.
Calves
Sit on the floor with the roller under one calf, hands supporting your weight behind you. Lift your hips and roll from just above the ankle to just below the knee. Cross the opposite ankle over the treated leg to increase pressure if the standard position feels insufficient. Rotate the foot inward and outward to access the medial and lateral gastrocnemius heads. Calf rolling is particularly beneficial before running and for individuals who wear heeled footwear regularly.
Glutes and Piriformis
Sit on the roller and cross one ankle over the opposite knee (figure-4 position). Shift your weight toward the crossed side and roll slowly through the glute of that side. The figure-4 position externally rotates the hip, placing the piriformis — a deep external rotator frequently involved in sciatic nerve compression — under more direct pressure. This is one of the most consistently effective self myofascial release techniques for lower back and hip tightness.
Stretching Exercises with a Roller: Beyond Myofascial Release
A foam roller is not only a rolling tool — its cylindrical shape and firm surface make it useful as a prop for stretching exercises that would otherwise be difficult to achieve on a flat surface.
- Thoracic extension over the roller: Place the roller horizontally under the mid-back and allow the upper spine to extend over it, with arms crossed over the chest or extended overhead. This passive extension stretch counteracts the forward flexion posture of prolonged sitting and is one of the most effective stretching exercises with a roller for office workers and cyclists.
- Chest opener: Place the roller vertically along the spine from tailbone to head. Allow both arms to open out to the sides at shoulder height, letting gravity draw the shoulders back and the chest open. Hold for 60–90 seconds. This stretch is highly effective for addressing the pectoral tightness associated with forward head posture.
- Hip flexor stretch with roller support: In a low lunge position, place the back knee on the roller (on a mat) and drive the hips forward into the hip flexor stretch. The roller elevates the back knee slightly and allows a small rocking motion, adding a dynamic element to what is otherwise a static stretch.
- Lat stretch with roller: Kneel beside the roller, place one forearm on it with the arm extended, and allow the torso to sink toward the floor while the roller moves away from you. This creates a lateral trunk and latissimus dorsi stretch that is difficult to replicate without a prop.
- Hamstring stretch with roller: Sit with one leg extended and the calf resting on the roller. Hinge forward from the hips — not the lower back — maintaining a neutral spine. The roller elevates the leg slightly, increasing the stretch angle compared to a flat-floor hamstring stretch.
Self Myofascial Release Benefits: What the Evidence Supports
The self myofascial release benefits that are well-supported by current research include:
- Acute increases in range of motion: Consistently demonstrated across studies, with effects appearing within a single session and maintained for up to 30 minutes post-rolling. This makes SMR useful as a mobility preparation tool before athletic activity.
- Reduced delayed onset muscle soreness (DOMS): Multiple studies show that foam rolling for 10–20 minutes within two hours of exercise significantly reduces DOMS severity at 24, 48, and 72 hours post-workout compared to passive recovery.
- Improved arterial stiffness and vascular function: Research from the Journal of Strength and Conditioning Research found that foam rolling reduced arterial stiffness — a cardiovascular risk marker — suggesting benefits beyond musculoskeletal recovery.
- Faster restoration of sprint performance after fatigue: Athletes who foam rolled between high-intensity efforts recovered sprint speed more quickly than those who rested passively, suggesting a role in intermittent sport performance.
- Reduction in perceived muscle tightness and pain: Subjective tightness and pain scores consistently improve following SMR, even in populations with chronic musculoskeletal complaints including lower back pain and fibromyalgia.
What the evidence does not yet strongly support is permanent structural change to fascial tissue from foam rolling alone. The acute benefits are real and clinically meaningful; long-term fascial remodelling requires sustained loading and time beyond what foam rolling typically provides. SMR is most accurately understood as a maintenance and recovery tool, not a corrective intervention for structural tissue pathology.
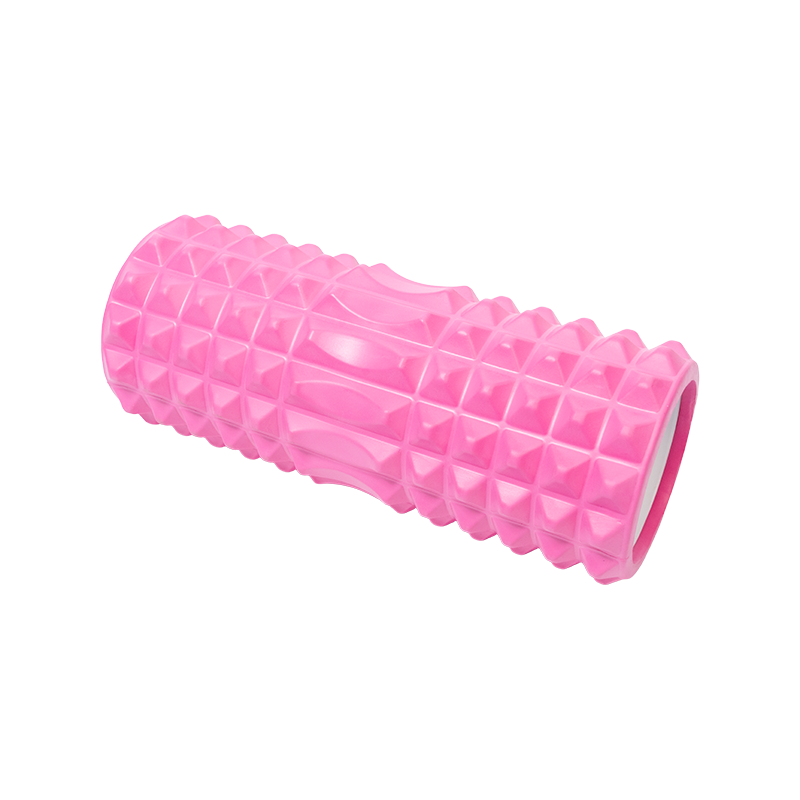
Choosing the Right Foam Roller for Home Use
Foam rollers vary in density, surface texture, size, and vibration capability. The right choice depends on experience level, target muscle groups, and sensitivity tolerance.
| Roller Type | Density | Best For | Not Ideal For |
|---|---|---|---|
| Soft foam (white EPE) | Low | Beginners, sensitive tissue, post-injury | Dense muscle groups; degrades quickly with regular use |
| Medium-density EVA foam | Medium | General use; most body areas; intermediate users | Very experienced users with high tissue density |
| High-density (black) EVA | High | Experienced users; large muscle groups; athletes | Beginners; sensitive areas; bony regions |
| Textured / grid roller | High | Targeted trigger point work; experienced users | Beginners; acute inflammation; superficial tissue |
| Vibrating roller | Variable | Enhanced neurological response; recovery; warm-up | Budget-conscious buyers; those new to SMR |
A standard 90 cm × 15 cm high-density roller covers the full range of exercises using a foam roller — from upper back to calves — and is the most versatile choice for home use. Shorter 45 cm rollers are more portable and sufficient for lower body work but cannot accommodate full thoracic spine rolling in a single pass.
When to Avoid Foam Rolling
Foam rolling is contraindicated in several situations where compression of soft tissue could cause harm rather than relief:
- Acute muscle tears or strains: Rolling a freshly injured muscle increases bleeding and tissue disruption. Wait a minimum of 72 hours after an acute soft tissue injury before introducing SMR, and begin with very light pressure.
- Deep vein thrombosis (DVT) risk: Do not foam roll the lower legs if DVT is suspected or confirmed. Compression of a clotted vein carries serious cardiovascular risk.
- Osteoporosis: Rolling over or adjacent to the spine or other load-bearing bones should be avoided or performed with extreme care in individuals with low bone density.
- Active inflammation or infection: Foam rolling acutely inflamed tissue increases local temperature and circulation, which can exacerbate inflammatory responses.
- Peripheral neuropathy: Reduced sensory feedback in the lower limbs makes it difficult to gauge appropriate pressure, increasing the risk of unintentional tissue damage.
A useful general rule: if an area is acutely painful, swollen, red, or warm to the touch, foam rolling is not appropriate until those signs resolve. Chronic tightness and post-exercise soreness respond well to rolling; acute pathology does not.
")
")
")
")
")
")
