

 English
 日本語
日本語 Español
What Is a Pilates Ring and What Does It Do?
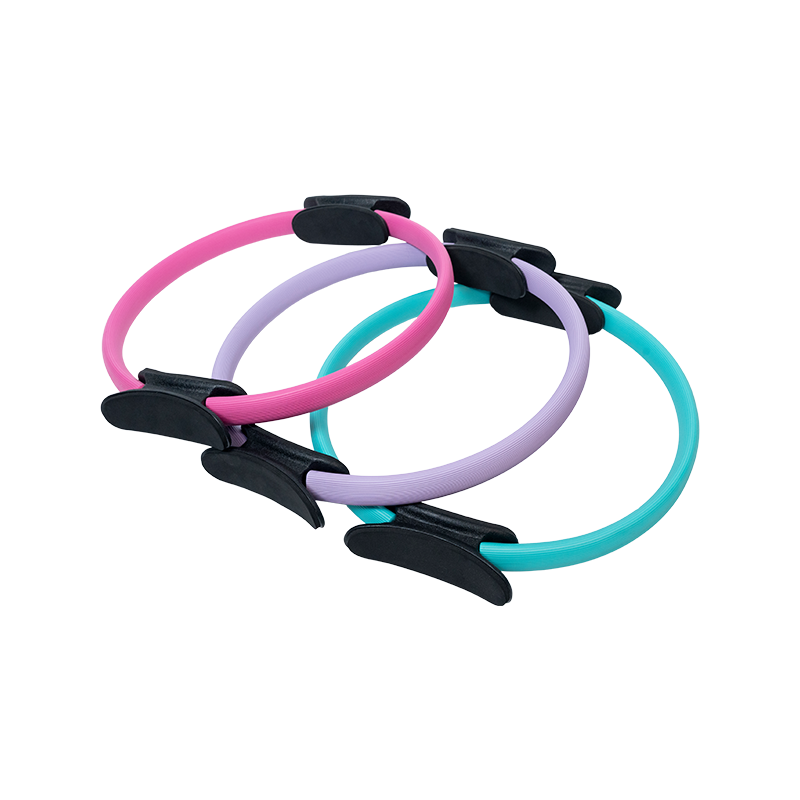
A Pilates ring—also called a magic circle, fitness ring, or yoga ring—is a flexible circular resistance tool typically 33–38 cm in diameter, constructed from fibreglass, carbon fibre, or flexible rubber, with padded handles on opposite sides. It was developed as part of the original Pilates method by Joseph Pilates himself, who used a metal ring derived from a beer keg lid as a resistance prop for studio work.
The ring works on a simple principle: you squeeze or press against it, and its resistance—usually rated between 1.5 and 3.5 kg of compression force—activates the muscles doing the squeezing. This makes it a two-directional resistance tool: it can be compressed inward (adduction exercises, chest presses) or resisted outward (abduction exercises). Unlike dumbbells or resistance bands, the ring requires constant muscular engagement to maintain position throughout a movement, which recruits stabilising muscles alongside the primary movers and improves neuromuscular control over time.
The core benefits of regular Pilates ring training include improved inner thigh and pelvic floor strength, better shoulder girdle stability, enhanced core activation under load, and increased body awareness—all without placing compressive stress on joints, making it equally suitable for rehabilitation contexts and active fitness training.
How to Use the Pilates Ring: Core Principles Before You Start
Before beginning any Pilates ring exercise, three foundational principles govern how to use the tool effectively—and safely:
Control the Squeeze, Don't Crush
The ring should never be compressed so forcefully that it bottoms out (pads touching). Effective resistance occurs in the first 2–4 cm of compression travel. A controlled, deliberate squeeze engages the target muscle fully; a violent crush recruits momentum and accessory muscles, reducing the exercise's effectiveness and risking joint strain at the wrists, knees, or hips depending on placement.
Breathe Consistently
The Pilates breathing pattern—exhale on the exertion phase (the squeeze), inhale on the release—coordinates diaphragm and pelvic floor engagement with the movement. Breath-holding during ring exercises, a common beginner error, increases intra-abdominal pressure and reduces core stability. Establishing a consistent breath rhythm before adding resistance is always the correct progression order.
Maintain Neutral Spine
Most Pilates ring exercises are performed from a neutral spine position—the natural, gentle lumbar curve maintained without flattening or over-arching. Losing neutral spine when the ring adds resistance is the primary indicator that the exercise load exceeds current control capacity. Reduce resistance or movement range before proceeding rather than compensating with posture changes that shift load onto passive structures.
Pilates Ring Exercises for Beginners: A Step-by-Step Starter Routine
The following six exercises form a complete beginner routine covering the inner thighs, chest, shoulders, core, and glutes. Perform each exercise for 10–12 repetitions (or 10 seconds of sustained hold where indicated), rest 20–30 seconds between exercises, and complete the full circuit twice.
1. Inner Thigh Squeeze (Supine)
Lie on your back with knees bent and feet flat on the floor, hip-width apart. Place the ring between your inner knees, pads resting against the soft tissue just above the knee joint. Inhale to prepare, then exhale and gently squeeze the ring inward, holding the compression for 2 seconds before slowly releasing. Keep the lower back in neutral throughout—avoid pressing it flat into the mat as you squeeze. This exercise targets the adductors and simultaneously activates the pelvic floor, making it a foundational movement for pelvic stability work.
2. Chest Press (Seated or Standing)
Sit tall or stand with feet hip-width apart. Hold the ring at chest height with both palms pressing against the pads from outside, fingers pointing upward. Exhale and press the ring inward, feeling the chest and anterior shoulder muscles engage. Hold for 2 seconds, then slowly release. Keep the shoulders drawn back and down—avoid allowing them to creep toward the ears as resistance increases. This exercise is particularly effective for activating the mid and lower trapezius alongside the pectorals.
3. Overhead Press with Ring
From seated or standing, raise the ring overhead with both hands on the pads. Press gently inward to create light tension, then slowly lower the ring behind your head until your upper arms are parallel to the floor, then return. The sustained compression throughout the movement activates the serratus anterior and maintains scapular stability as the arms move through an elevated arc—a common weakness pattern that this exercise specifically addresses.
4. Standing Inner Thigh Squeeze
Stand tall with feet wider than hip-width. Place the ring between your thighs, just above the knee. Maintaining an upright posture with a slight forward lean from the hips, perform 10 slow squeezes. Progress this exercise by adding a shallow squat (to approximately 30° knee flexion) while maintaining ring compression—this combination simultaneously loads the glutes, adductors, and quadriceps in a functionally integrated pattern.
5. Glute Bridge with Ring
Return to the supine position with knees bent. Place the ring between your knees as in Exercise 1. Simultaneously squeeze the ring and drive your hips upward into a bridge position, exhaling as you lift. Hold at the top for 2–3 seconds, maintaining both the ring compression and the bridge height, then slowly lower. The combination of adduction and hip extension creates a powerful co-activation pattern across the gluteus medius, gluteus maximus, and adductors that isolated exercises rarely achieve.
6. Lateral Arm Press (Abduction Resistance)
Sit or stand tall. Hold the ring with both hands inside the pads, pressing outward against the ring's resistance (the reverse of the chest press). Slowly move your arms from chest height out to the sides and back, maintaining consistent outward pressure throughout the arc. This exercise trains the posterior deltoid, rhomboids, and mid-trapezius—the postural muscles that counteract the forward-rounded shoulder posture common in desk workers—making it a particularly valuable addition to any beginner's ring routine.
Yoga Ring Exercises for Beginners: Combining Flexibility and Resistance
When used within a yoga-influenced practice, the ring functions as both a resistance tool and a prop that facilitates deeper stretching and alignment. The following exercises integrate the ring into poses that benefit from the additional feedback and assistance it provides:
Ring-Assisted Forward Fold
Sit with legs extended. Loop the ring around the soles of both feet and hold the opposite pad with both hands. Use the ring's resistance to gently deepen your forward fold—pulling yourself toward your feet without rounding the lower back. The ring provides consistent, controllable traction that allows a more gradual, sustainable hamstring stretch than reaching for the feet directly, making it particularly helpful for beginners with tight posterior chains.
Seated Twist with Ring Resistance
Sit cross-legged and hold the ring vertically at chest height with both palms on the pads. As you rotate into a spinal twist, press the ring inward to activate the obliques and deepen the rotational engagement. The resistance cue from the ring helps beginners understand the difference between a thoracic rotation (desirable) and a lumbar rotation (less desirable and potentially irritating for those with disc sensitivity).
Bridge Pose with Inner Thigh Activation
As in the Pilates glute bridge, placing the ring between the knees during bridge pose (Setu Bandhasana) prevents the common compensation of knees falling outward as the hips rise. The adductor activation this creates also deepens the connection to Mula Bandha (root lock) for practitioners developing their pranayama practice—making the ring a genuinely useful prop for yoga beginners working on pelvic floor awareness alongside flexibility.
Common Beginner Mistakes and How to Avoid Them
Most beginners make the same set of errors when first using a Pilates or yoga ring. Recognising them early prevents ingrained compensations that limit progress:
- Gripping too hard with the hands during leg exercises. When the ring is placed between the knees or ankles, the hands should rest lightly on the pads for positioning only—not bear load. Actively gripping recruits the upper body and reduces focus on the target muscles.
- Rushing through repetitions. The Pilates ring is a slow-twitch, endurance-focused tool. Fast, bouncy repetitions bypass the intended muscle recruitment pattern. Aim for a 2-second squeeze and 2-second release tempo as a baseline.
- Placing the ring directly on the knee joint. The pads should always contact the soft tissue above or below the knee, never directly on the joint. Direct pad pressure on the joint can cause discomfort and does not improve exercise mechanics.
- Using a ring with too much resistance too early. Beginner rings rated at 1.5–2 kg resistance are appropriate for most newcomers. Heavier resistance rings (2.5–3.5 kg) should be progressed to only once correct form is established across all basic exercises.
- Neglecting the release phase. The eccentric (release) phase of each ring squeeze is as important as the concentric (compression) phase for building muscular control. Releasing the ring suddenly rather than controlling the return defeats half the exercise's purpose.
Choosing the Right Pilates Ring: What to Look For
Not all Pilates rings perform equally, and the differences are more significant than the price gap might suggest. Key specifications to evaluate before purchasing:
- Core material: Fibreglass rings offer consistent resistance and excellent durability, returning to their original shape reliably after thousands of compression cycles. Flexible plastic rings are lighter and less expensive but may develop a permanent set (reduced resistance) after extended use.
- Pad size and coverage: Wider, softer pads (at least 8 cm across) distribute contact pressure more comfortably against the inner thighs and ankles. Small, hard pads cause bruising and discomfort that discourages consistent use.
- Diameter: A 38 cm ring suits most adults for standard inner-thigh and arm exercises; smaller 33 cm rings are appropriate for shorter individuals or for ankle placement exercises where a standard ring extends too far from the body.
- Resistance rating: Choose a ring clearly labelled with its resistance value in kilograms or pounds. Rings without stated resistance ratings make progression planning impossible and often indicate inconsistent quality control in manufacture.
Used consistently two to three times per week, a Pilates or yoga ring delivers genuine, measurable improvements in inner thigh strength, shoulder stability, and core endurance within four to six weeks—results that translate directly into improved performance in both Pilates mat work and broader athletic activities. Its compact size, low cost, and joint-friendly resistance profile make it one of the most accessible and effective beginner fitness tools available.


")
")


